This is a fun way to create a keepsake for Mom that she can take with her wherever she goes! Choose your shrink film carefully as some brands shrink more or less than others. Also, be sure to read the directions completely to ensure you use the correct paint/markers and oven temperature.
Materials
- Shrink film
- Acrylic paint
- Permanent marker
- Jump rings, one or two per handprint
- Keyring
Other equipment
- Paint brush
- Hole punch
- Scissors
- Sheet pan
- Parchment paper
- Oven and oven mitts
 |
Instructions
1. Decide where to place the handprints on the page. Be sure to leave enough room between them. I tried to fit ours all on one page (we did two prints per kid), but in hindsight, I wish I'd left more room... you can always fill the rest of the space with other drawings.
2. Explain the plan to the kids. I made the mistake of thinking my 2-1/2 year old would understand, but he thought we were playing smear the paint around! Luckily, I was holding onto his hand and wrist, so the smearing was minimal. (The wet paint should wipe off, if needed).
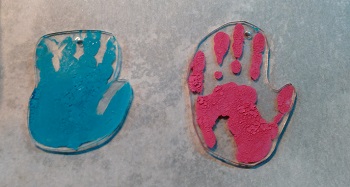
3. Paint the first little hand. You want enough paint to cover the whole hand, but not so there's any overly wet spots or globs of paint anywhere. (We used too much paint, which is why it looks clumpy and cracked, but we love our results anyway because that's just how things go with little kids!)
4. Press the hand onto the shrink film and be sure all the fingers touch the film so they leave a mark. We thought that the fingers looked good from just pressing, so we did NOT roll them.
5. Lift the hand up in one smooth motion. We found "1... 2... 3... LIFT!" to work the best so both kid and helper lifted at the same time. Be sure to hold the film down with one of your hands, or a finger, so it doesn't stick.
6. Let the paint dry. Once dry, if you'd like to label them with name, age, date, etc., use a permanent marker or other writing tool recommended on the instructions for the film.
7. Preheat the oven according to the instructions for the film.
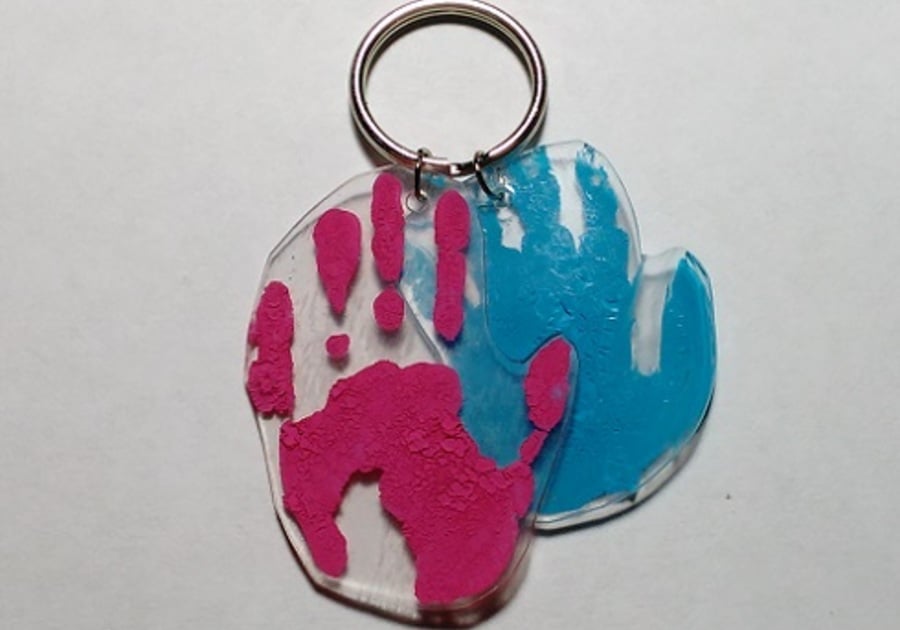
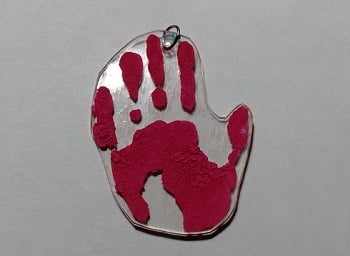
8. Decide where to punch the hole for the jump ring, keeping in mind how the print will hang from the keychain. Cut the print out, while leaving enough space around the hole so it doesn't end up too thing to hold the ring.
9. Place the prints on a baking sheet lined with parchment paper and bake them according to the instructions on the package.
10. Once cool, seal with an acrylic spray to keep the paint from chipping or scratching.
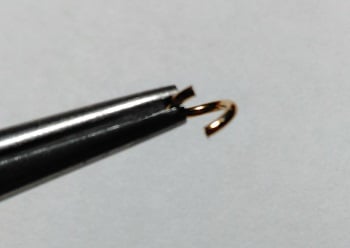
11. Attach a jump ring (or two for a slightly longer chain) to each print. When opening the jump rings, do not pull it straight apart, instead twist each side in the opposite direction. This way you'll twist it back into shape, where pulling apart will distort the shape and make it nearly impossible to close.
 |
12. Attach the keyring to the jump rings. I put the prints on so they were back-to-back and I could see the front of each kid's print at all times, but if you want them all on in the same direction, be sure you have them turned the right way.
 |
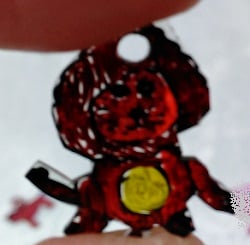
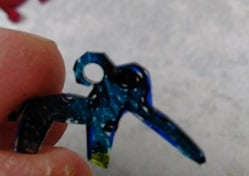
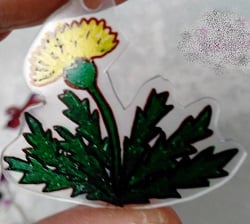
Have fun using up the scraps you cut off too! We also made some animals and other fun things:
 |  |  |
 | ||
Macaroni KID Chestermere is a free local calendar, weekly e-newsletter and website focused on fun family events and information in the Chestermere, Langdon, Indus and surrounding rural areas. We gather all kinds of local family events and activities each week and add useful information about classes, family-focused local businesses, deals, product reviews, recipes, crafts, school and camp guides and more. | ||
 |  |  |
 |  |  |
Are we missing something? Please use our Submit an Event form to send us all the details! If you have original recipes, crafts, or family fall fun ideas that you would like to share with our Macaroni KID community, please email kimmcrae@macaronikid.com. Be sure to include a poster or image if you've got one!